A4tech G6–70D Käyttöohje
Lue alta 📖 käyttöohje suomeksi merkille A4tech G6–70D (40 sivua) kategoriassa Hiiri. Tämä opas oli hyödyllinen 13 henkilölle ja sai 4.5 tähden keskimäärin 2 käyttäjältä
Sivu 1/40
EnglishSvenskaNorskSuomi
Wireless Optical Mouse
Optisk trådlös mus
Optisk trådløs mus
Langaton optinen hiiri
Art.no Model
38-2846 G6–70D Ver. 201101
2
English
Wireless Optical Mouse
Art.no 38-2846 Model G6–70D
Please read the entire instruction manual before use and save it for future reference.
We reserve the right for any errors in text or images and for making any necessary
technical changes to this document. If you should have any questions concerning
technical problems please contact our Customer Services.
1. Description
• Wireless transmission (2.4 GHz)
• 16 channels and automatic
channel selection allows
themouse to be used in
thevicinity of other appliances
on thesame frequency band
• Low power, 8 mA
• Double-click button
• Supports Windows 2000/ME/
XP and VISTA
2. Contents
• Wireless optical mouse
• USB wireless receiver
• Receiver table stand
• Instruction manual
• CD-ROM software disc
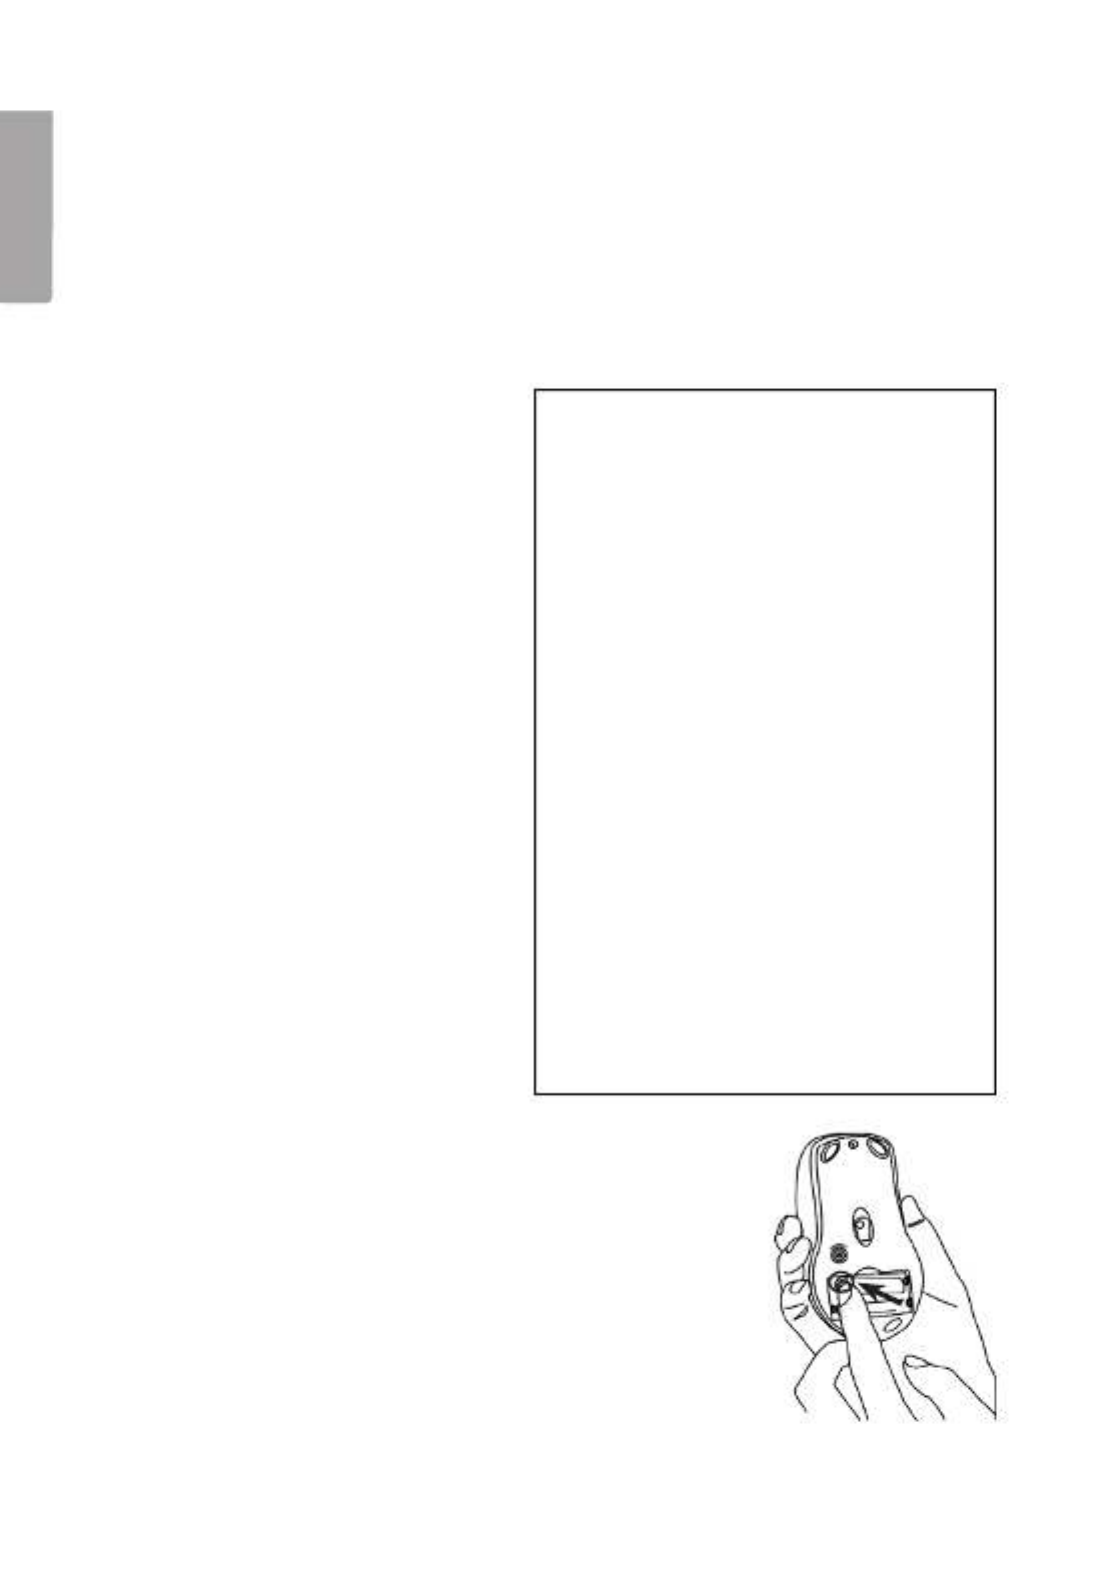
3. Inserting thebatteries
1. Insert 2 x LR03/AAA batteries, according to the polarity
markings (+ and – ) in thebattery compartment.
Points worth bearing in mind!
• Other wireless equipment operating
on the same frequency band may
reduce the range of the product.
• The range of all wireless equipment is
affected by obstacles between
the transmitter and the receiver
(aconcrete wall reduces the signal far
more than a plasterboard partition,
forexample).
If you are having problems with
the operation of the system,
try the following solutions
• Switch off any other wireless equip-
ment to check whether it could be
causing the problem.
• Move the wireless equipment and/
or reduce the distance, and reduce
thenumber of obstacles (walls, fur-
niture, etc.) between the transmitter
andthe receiver.
3
English
4. Connecting to thecomputer
The following installation instructions apply to Windows XP with
Service Pack 2 installed.
1. Connect thereceiver or its extension cable to avacant USB port on your laptop
or PC.
If there are no available USB ports, an external USB hub (not included) can Tip!
be used.
2. The computer will detect thereceiver and automatically install thenecessary
device drivers. No extra drivers need be installed as long as only standard mouse
functions are used.
If advanced mouse functions are to be used, theaccompanying software needs
to be installed by following theinstructions in thesection Installation of software
for all functions.
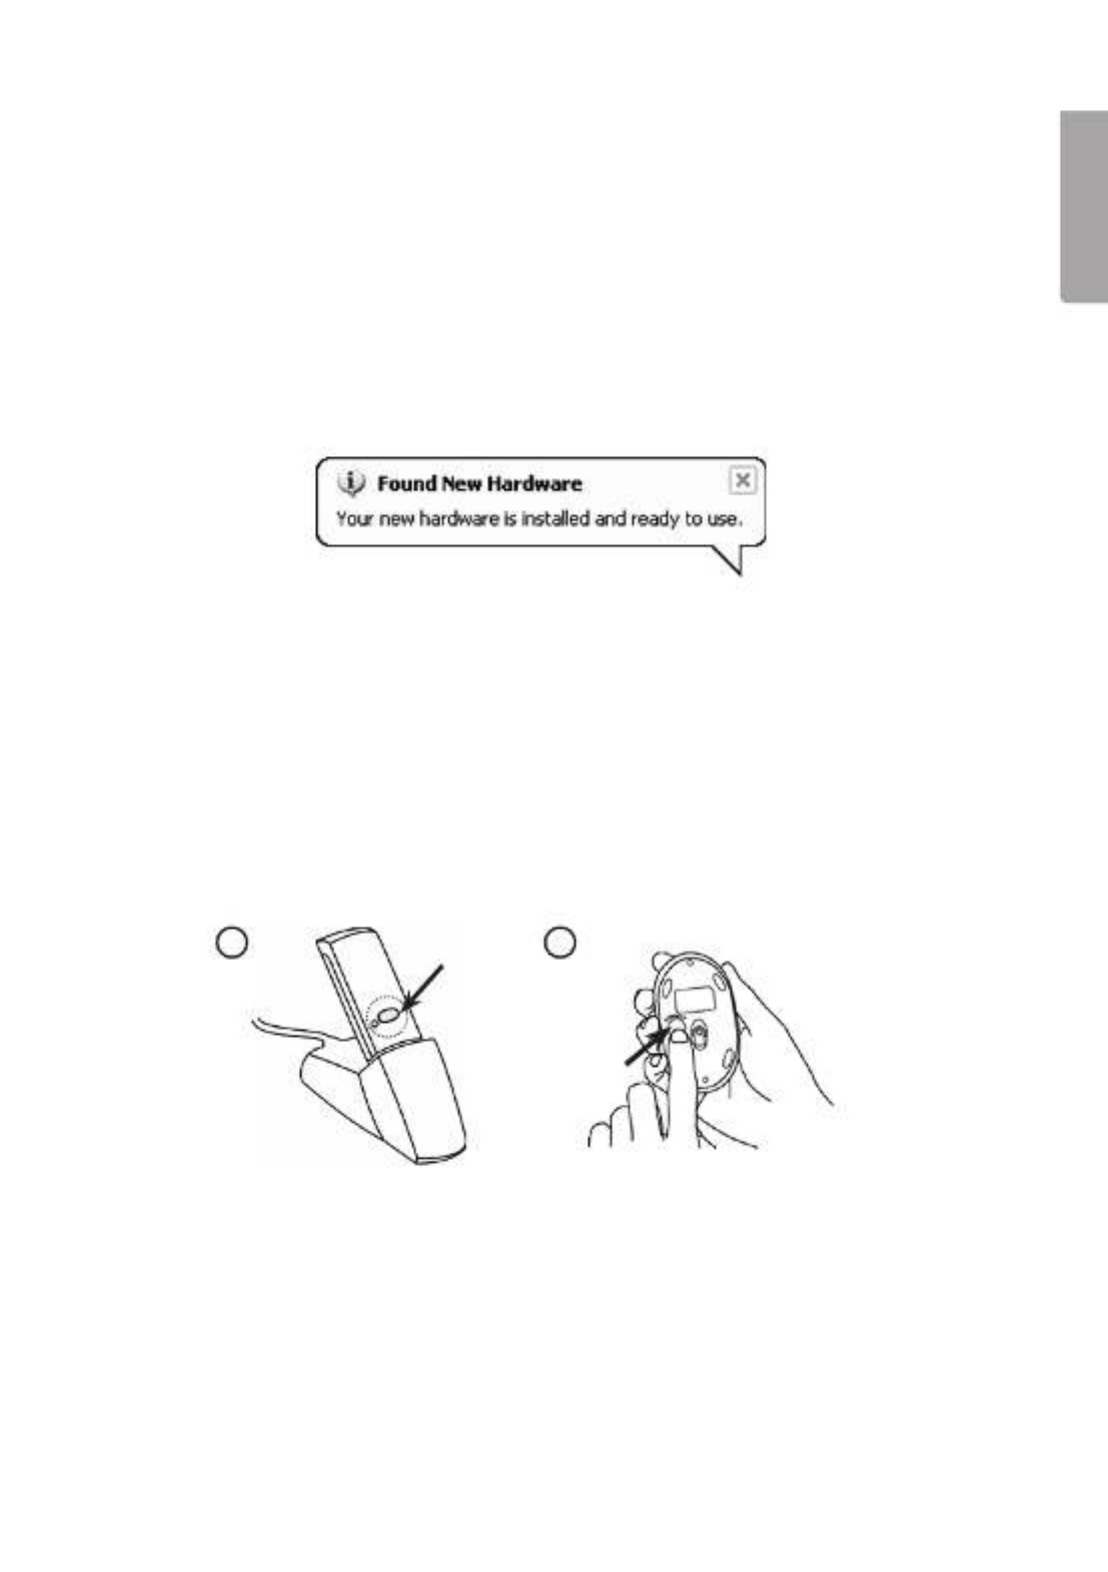
3. When theinstallation has been completed, push the[CONNECT] button on
thereceiver to create alink to themouse. The green LED on thereceiver should
start to flash.
4. Press the[CONNECT] button on thebottom of themouse to complete
theconnection process, themouse is now ready for use.
N.B: If themouse’s batteries are removed thereceiver and themouse need to be
reconnected by repeating steps 1 to 4 above.
3 4
Troubleshooting
The mouse does not work even though it has been connected
1. Remove thereceiver from theUSB port and insert it again.
Repeat theconnection process, following theinstructions above.
2. Try connecting thedevices to another USB port or another computer.
3. The optical sensor might not work as well on certain surfaces such as glass
ormirrors. The optical sensor does, however, work on most surfaces.
Tuotetiedot
| Merkki: | A4tech |
| Kategoria: | Hiiri |
| Malli: | G6–70D |
Tarvitsetko apua?
Jos tarvitset apua merkille A4tech G6–70D esitä kysymys alla ja muut käyttäjät vastaavat sinulle
Hiiri A4tech Käyttöohjeet

25 Joulukuuta 2024
Hiiri Käyttöohjeet
- Hiiri Vorago
- Hiiri Gigabyte
- Hiiri Philips
- Hiiri Krom
- Hiiri Balam Rush
- Hiiri Razer
- Hiiri Kogan
- Hiiri Urban Factory
- Hiiri Trust
- Hiiri Goldtouch
- Hiiri Asus
- Hiiri BlueBuilt
- Hiiri Gembird
- Hiiri HP
- Hiiri Media-tech
- Hiiri JLab
- Hiiri Mars Gaming
- Hiiri Niceboy
- Hiiri Sharkoon
- Hiiri Dell
- Hiiri CSL
- Hiiri Conceptronic
- Hiiri Acer
- Hiiri Genesis
- Hiiri Logilink
- Hiiri V7
- Hiiri Mitsai
- Hiiri Speed-Link
- Hiiri Renkforce
- Hiiri Cougar
- Hiiri R-Go Tools
- Hiiri BenQ
- Hiiri Sven
- Hiiri Manhattan
- Hiiri EVOLVEO
- Hiiri ModeCom
- Hiiri Xtrfy
- Hiiri Bluestork
- Hiiri IOPLEE
- Hiiri Mad Dog
- Hiiri Best Buy
- Hiiri ADATA
- Hiiri NPLAY
- Hiiri Gamesir
- Hiiri NGS
- Hiiri HyperX
- Hiiri Keychron
- Hiiri Rapoo
- Hiiri Savio
- Hiiri Ednet
- Hiiri Buffalo
- Hiiri Logitech
- Hiiri SureFire
- Hiiri KeepOut
- Hiiri Steelseries
- Hiiri Xcellon
- Hiiri SMK-Link
- Hiiri Cherry
- Hiiri Defender
- Hiiri Hamlet
- Hiiri Perixx
- Hiiri INCA
- Hiiri Getttech
- Hiiri 3Dconnexion
Viimeisimmät Hiiri Käyttöohjeet
8 Huhtikuuta 2025
3 Huhtikuuta 2025
30 Maaliskuuta 2025
30 Maaliskuuta 2025
30 Maaliskuuta 2025

28 Maaliskuuta 2025
28 Maaliskuuta 2025
28 Maaliskuuta 2025

27 Maaliskuuta 2025
27 Maaliskuuta 2025